Automatically building and deploying Unity applications to itch.io
When doing game jams, you can easily waste a lot of time fixing one bug, manually build for four or more platforms, upload each to itch only to find there is another critical bug and you have to start all over again. In this post, I’ll explain how to set up continuous deployment so all of this will be done automatically when you push to your git master branch.
At first glance, it seemed like Unity Cloud build would be the obvious solution… However it costs $9 a month, and I only do this as a hobby and I don’t like depending paid services if I don’t have to. Also I haven’t checked if it would integrate well with Itch.
I decided to go for a docker-based solution, and started looking for images. After a quick search it seemed pretty clear that gitlab.com/gableroux/unity3d was the most well-maintained and popular solution.
There seems to be two common ways to set it up, either using gitlab-ci, which is what the official example does, or using Travis and GitHub as explained by Carlos Castro on his blog.
I wanted to do it the most official way to minimize the amount of corner-cases and workaround I would run into, so I went with gitlab-ci, which means you should host your repo on gitlab.com or another GitLab instance.
While the official documentation for setting up was good enough, I found it a bit scattered (i.e. some steps are in the output log of a docker container etc. and some info was in the example readme and some in gitlab issues and some in the gitlab docker image readme. Also I was unfamiliar with GitLab CI, which meant I had to look up a lot of things along the way.
This is why I decided to write this guide, so you (and future me) don’t have to search all over the place, when all you want to do is quickly automate deployment for a new jam game.
Without further ado, here are the steps:
Building and testing with GitLab
Add configuration files to your repo
- Clone
https://gitlab.com/gableroux/unity3d-gitlab-ci-example.gitand copy these files over to your project- The entire
./cifolder .gitlab-ci.ymlAssets/Scripts/Editor/BuildCommand.cs(needs to be at this particular path in your repo too)
- The entire
- Open up
.gitlab-ci.ymland make the modifications you need. You might want to:- Change
BUILD_NAMEto something sensible. - Edit the
image:field at the top to set the unity version you want. I left it atimage: gableroux/unity3d:2019.3.7f1as that was the version I was on. - Disable the targets you don’t need, either by deleting or commenting them out, or you can add a new property
when: manualso they don’t trigger automatically. I disabledpages(deploy WebGL build as GitLab page),build-ios-xcode,build-and-deploy-ios,build-android,deploy-android,build-StandaloneLinux64-il2cpp,build-StandaloneOSXUniversal. This left me with just tests, Windows, MacOS, Linux and WebGL being built automatically.
- Change
- Commit your changes and push to your GitLab repo.
Now you should be able to go to your project’s pipeline overview to view your new gitlab-ci jobs that are being run. Find it by going to CI/CD->Pipelines. You should see a line there for you newly pushed commit.
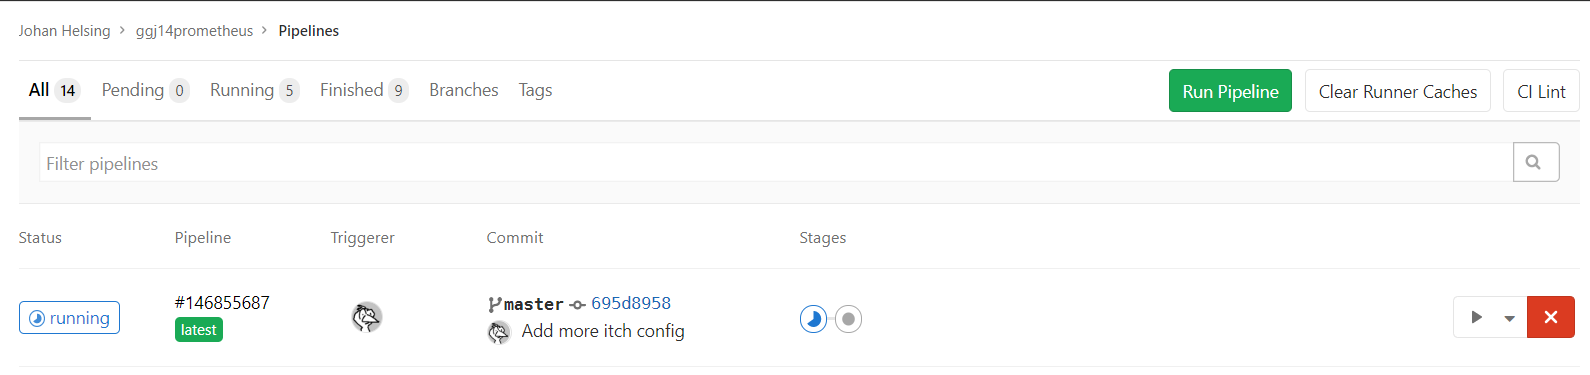
Click where it says running to see the details of the individual jobs.
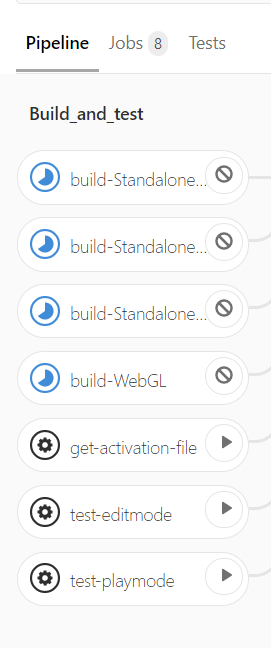
You should now see a graph of all your configured jobs. They should all fail because we haven’t yet configured the unity license. This is what we’re going to do next. :)
Unity activation
Unity activation is a bit of a hassle, and it’s different depending on whether you’re running the pro or free edition. Here I’ll assume you’re a hobbyist/indie and is using the free version.
First you need to get the the license activation file: unity-*.ulf
-
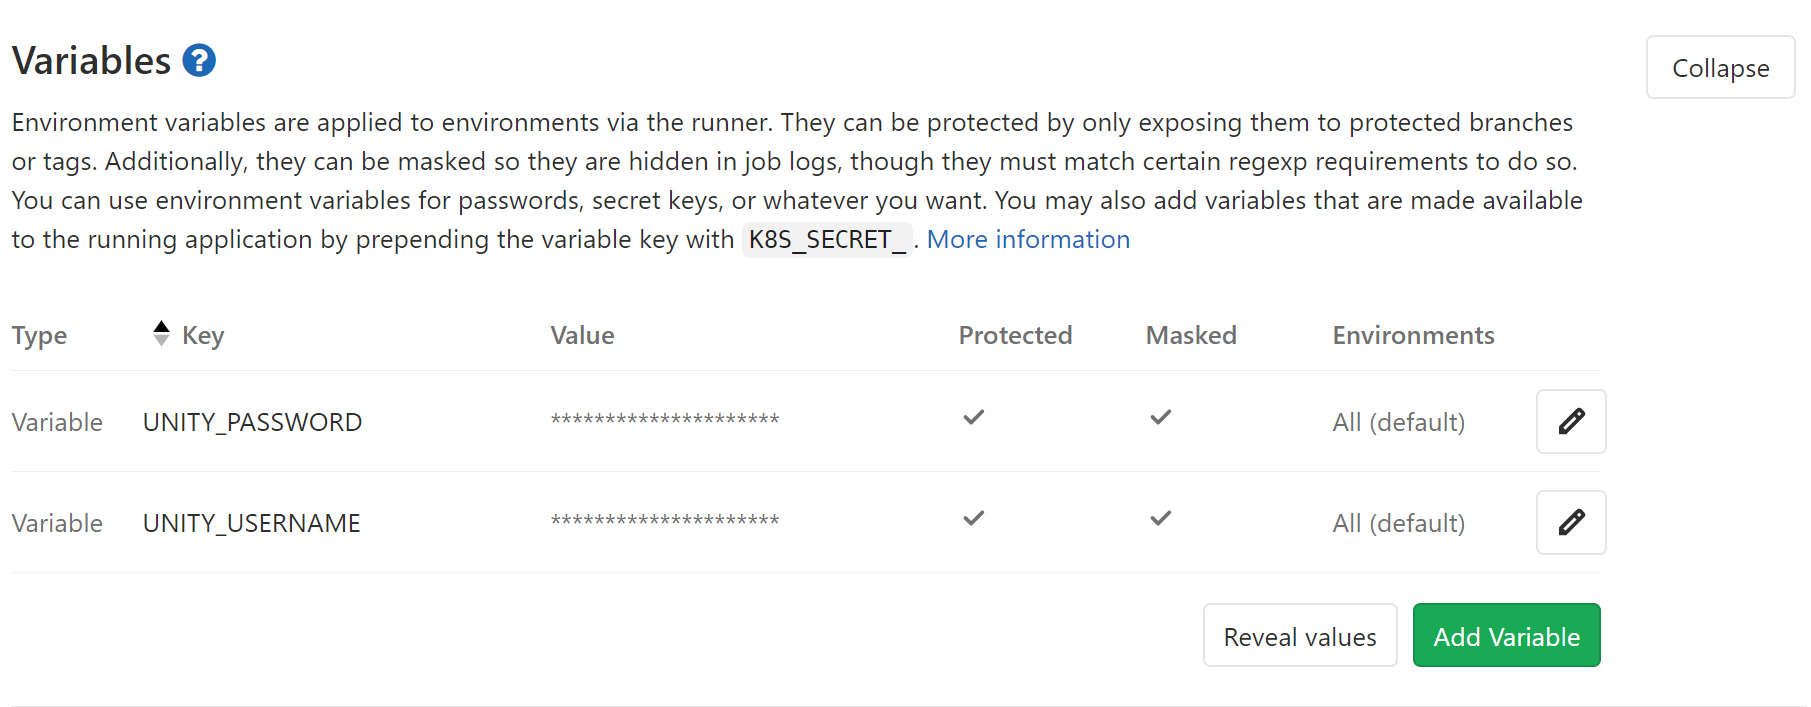
Go to your GitLab project’s home page and then
Settings->CI / CD->Variables) and add the following variables:UNITY_USERNAMEwith contents set to your emailUNITY_PASSWORDwith your password Mark both as masked and protected.
-
Go back to the CI pipeline job overview and run
get-activation-filethe step by pressing the play button. -
Download the job artifact, a zip-file with
unity-*.alfwithin 10 minutes (after that it will automatically be deleted from GitLab) -
Go to https://license.unity3d.com/manual and upload your
Unity-*.alffile.
-
After following the steps, you should be able to download your
unity-*.ulffile. Keep this file, and keep it safe. You can reuse it for other projects with a unity version from the same year (so you don’t have to do all these steps each time.
Finally, paste the contents of your unity-*.ulf file into a new CI variable (not file), UNITY_LICENSE_CONTENT.
Your project should now be ready to be built and tested. Try committing and pushing again, your builds should pass now. You can download the artifacts from the job details and verify that everything worked.
Deploying to itch.io
Get Butler credentials
- Download butler
- Run
butler loginfrom the command line, and authorize it in the browser. - Copy the contents of
~/.config/itch/butler_credsto a new GitLab CI variable,BUTLER_API_KEY, mask and protect it.
Add an Itch deployment job
Once again, open up your .gitlab-ci.yml. We’re going to add a new job for deploying to itch.io.
At the start of the file, in the variables section, add the following variables:
variables:
  BUILD_NAME: ExampleProjectName
  UNITY_ACTIVATION_FILE: ./unity3d.alf
  ITCH_USER: your_itch_user
  ITCH_PROJECT: your_game_name
At the end of your file, add the following to create a new deploy job:
itch:
  image: dosowisko/butler
  stage: deploy
  script:
    - VERSION=$CI_COMMIT_SHORT_SHA
    - butler push "./Builds/WebGL/${BUILD_NAME}" "${ITCH_USER}/${ITCH_PROJECT}:web" --userversion $VERSION
    - butler push "./Builds/StandaloneLinux64" "${ITCH_USER}/${ITCH_PROJECT}:linux" --userversion $VERSION
    - butler push "./Builds/StandaloneWindows64" "${ITCH_USER}/${ITCH_PROJECT}:windows" --userversion $VERSION
    - butler push "./Builds/StandaloneOSX" "${ITCH_USER}/${ITCH_PROJECT}:mac" --userversion $VERSION
  only:
    - master
That’s it. Commit and push to GitLab, and you should hopefully get a mail from itch.io after a while saying the builds are available :)
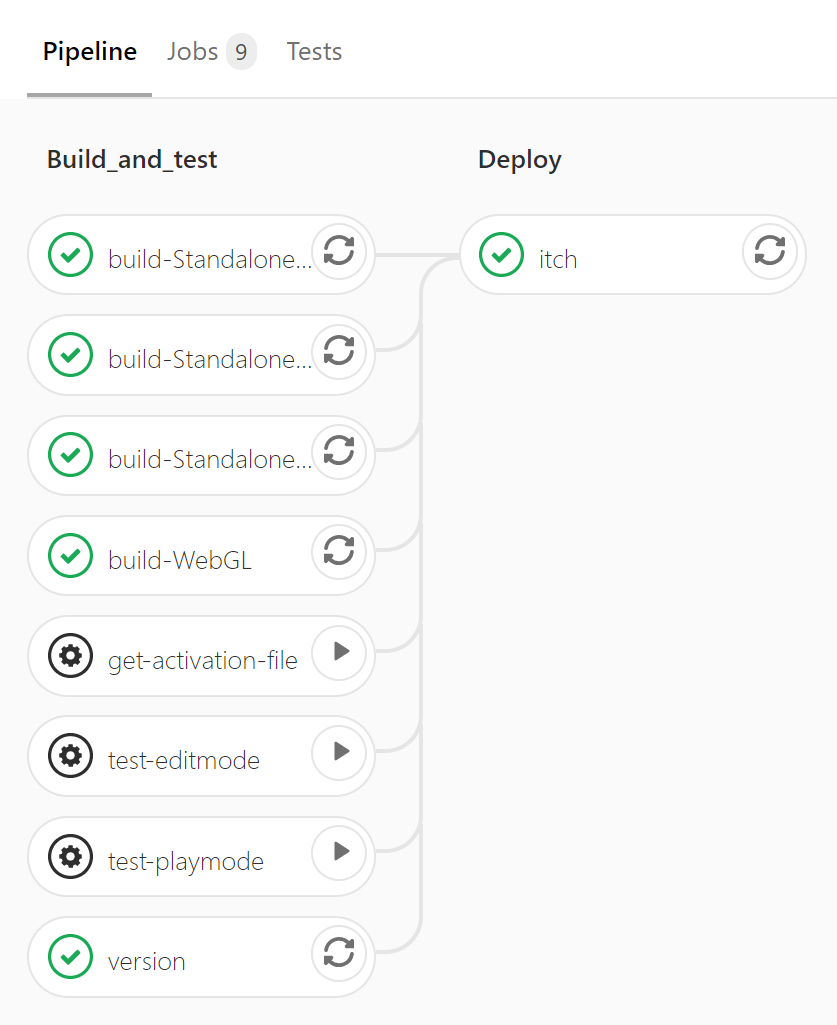
Nicer versions
As a bonus: if you don’t like having only the git sha1 as the version and want to have something based on the latest git tag (you need to have at least one tagged commit), you can add a new versioning job:
version:
  image:
    name: alpine/git:latest
    entrypoint: [""]
  stage: build_and_test
  script:
    - git describe --tag > ./version.txt # will generate something like "1.0.0-32-g040c782"
  artifacts:
    paths:
      - ./version.txt
And change your itch job in .gitlab-ci.yml as follows to use ./version.txt instead:
itch:
  image: dosowisko/butler
  stage: deploy
  script:
    - butler push "./Builds/WebGL/${BUILD_NAME}" "${ITCH_USER}/${ITCH_PROJECT}:web" --userversion-file ./version.txt
    - butler push "./Builds/StandaloneLinux64" "${ITCH_USER}/${ITCH_PROJECT}:linux" --userversion-file ./version.txt
    - butler push "./Builds/StandaloneWindows64" "${ITCH_USER}/${ITCH_PROJECT}:windows" --userversion-file ./version.txt
    - butler push "./Builds/StandaloneOSX" "${ITCH_USER}/${ITCH_PROJECT}:mac" --userversion-file ./version.txt
  only:
    - master
Now you should have nicer versions, but maybe a convoluted in order just to call git describe --tag. If you have a better suggestion, please let me know in the comments :)